Sunday, April 14, 2013

Mock Croc, Scallop, or Shell-in-the-Yarn

Shell motifs is to crocheters as seed stitches are to knitters: a basic pattern of stitches that creates a small, textured motif in the finished work. They take little advanced knowledge and make the work go quickly. One of the most popular shell motifs today is the overlapping detached shell, also known as the crocodile stitch.


A similarly-scaled effect can be created in either knit or crochet by varying the number of threads we pick up each time we wrap the yarn over the hook or needle. The difference between this and ruching is that with the scallop stitch, we pick up all of the threads from the working edge through the indicated thread for the current wrap, rather than picking up only the thread of the current wrap. As I noted in a previous post, this will create a variable thickness in the working row; crocheters may need to use a larger hook to get the bulk of multiple working threads through the previous work. Conversely, knitters may need to use a smaller needle to manage working the multiple threads.

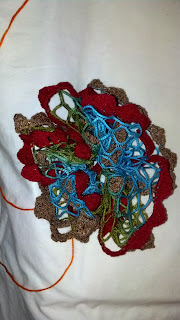
Single chain, Shell-in-Yarn, Starbella Flash
The basic method of working scallops is to pick up one additional thread on each stitch (or yarn-over) through the embellished edge, then one fewer thread on each stitch (or yarn-over) until only the working edge remains, and repeat.This works fine in a double or treble crochet and a wide mesh, in which the repeat may only take two or three stitches; it's a bit less obvious in knitting, where the repeat could take as many as twenty stitches.

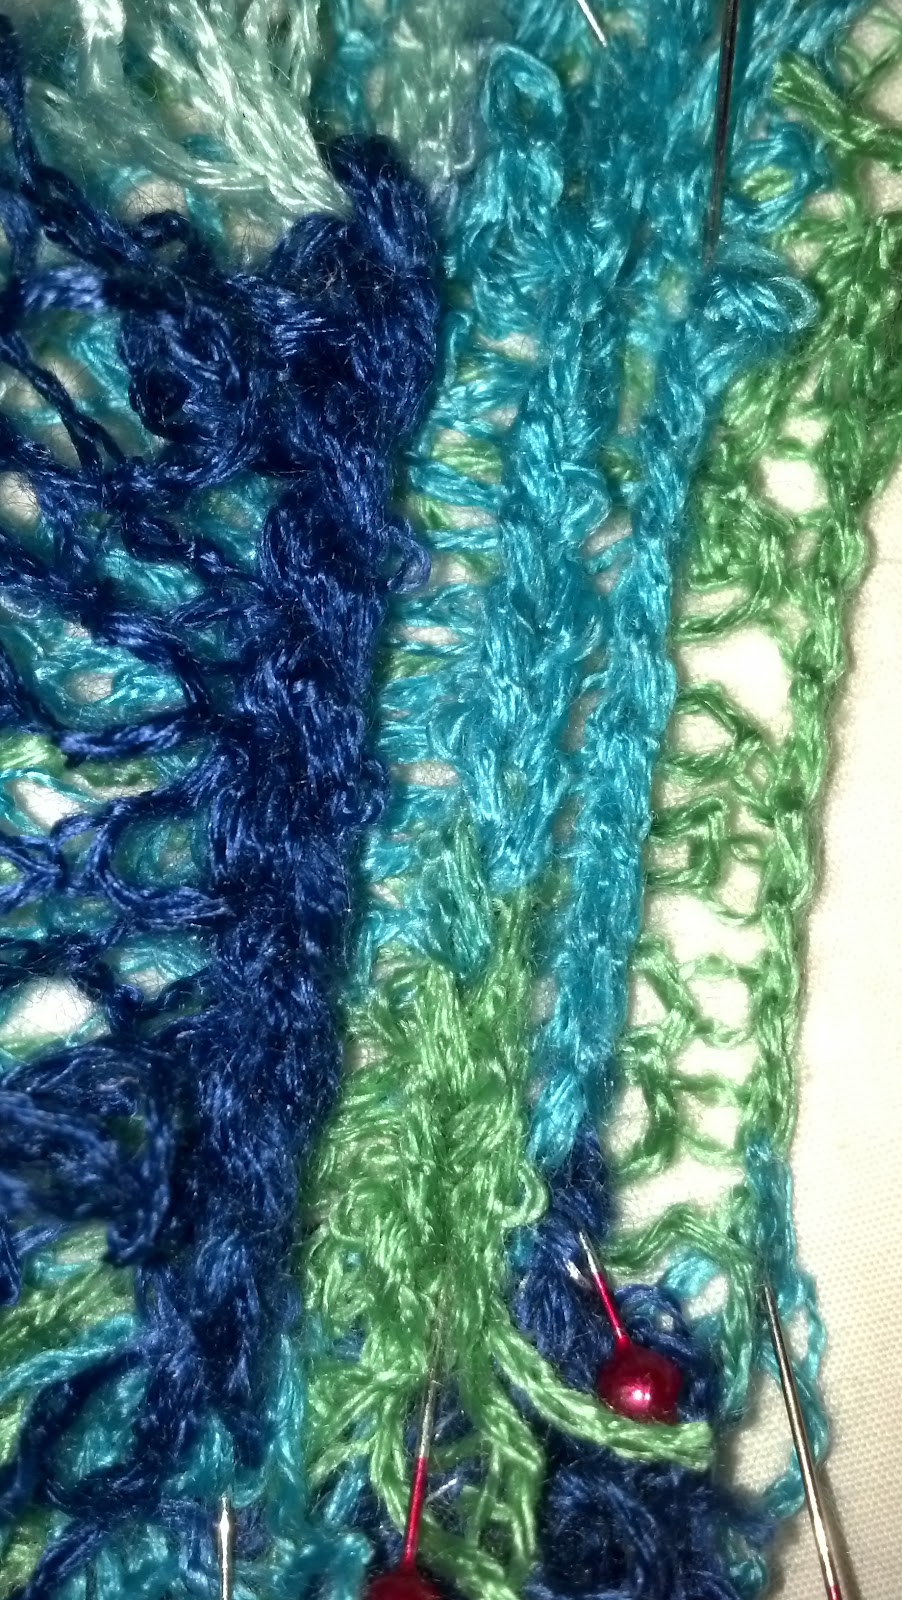
Six rows knit scallop, Starbella Flash

One method of shortening this is to work with multiples of two, three, or more threads on each stitch.

I brought the pattern forward on the sample at right by working 1, 4, 7. all, 7, 4, 1 threads on an every third row pattern over 20 stitches. I brought all the scallops to the front of the work, and straight ruffles to the back, as follows:

R1, 2: knit
--start pattern--
R3: knit scallop row
R4: knit
R5: purl
R6: purl scallop row
R7: purl
R8: knit
--end pattern--

The scallops aren't precisely counterposed on this sample — I should have worked over 21 stitches to do perfect three-and-a-half pattern repeats: (1, 4, 7, all, 7, 4 for a six-stitch pattern)

A deeper scallop might be achieved by skipping one or more spaces between each yarn-over.


6-row scallop stitch pattern
In crochet, scallops can be sent to one side of the work using the ball front/ball back technique discussed in a previous post.

Saturday, March 30, 2013

Front and Back of Work

It's easy to tell the inside from the outside of most knitted or crocheted garment pieces by the pattern of stitches: three-dimensional work such as cables and popcorn stitches are only apparent on one side of the finished work.

Up to this  point in this blog, I've only treated stitches that look the same on both sides of the cloth, with one exception: crocheting in the round.

When you crochet or knit [note: knit, not knit and purl] in the round, the bulk of the ruffle yarn remains on one side of the work, creating a tight ruffled texture on one side and the traditional appearance of knitting or crocheting on the other. When you work flat, the yarn  stays on the same side of the hook or needles, but each time you turn the work, you alternate working from the front and the back of the garment. This causes the ruffle to appear on both sides of the work, making it difficult to use for many garments other than The Scarf.

Knitting has a basic stitch that is different from the front and back of the work: stocking (stockinette) stitch. Alternating rows of knit and purl, the structure of the knit is seen on one side of the work, while a more condensed version of the garter stitch appears on the other side. With ruffle yarns, this usually-reverse side will contain all the fabric of the ribbon or mesh, while the knit side will appear as a loosely-worked traditional knit. Viewed from this side, the technique is called reverse stockinette stitch.

Crochet is another matter. In order to get a distinctive front and back of the work, we need to make sure that we are always feeding the yarn from what will become the outside of the finished fabric. Because this means switching the ball of yarn from in back of the work (when the ruffling is facing away from you) to the front of the work (between you and the hook, when the ruffling is facing towards you), I'm referring to it as "Ball Front/Ball Back". The following video describes the technique. 


Saturday, March 16, 2013

Friday, March 15, 2013

Mesh Yarns, Hairpin Lace, and Heirloom Sewing

Hairpin lace on the loom
Hairpin lace loops bound singly or in groups (top side)
Hairpin lace is a crochet technique in which long strips of fabric are created with long, even, loops on both sides of a central pair of stitches. Typically, the loops are crocheted together singly or in bunches, after which the strip is crocheted to other similar strips to create a full garment, though there are patterns in which the loops on adjacent strips are chained into each other (interwoven), or in which the crochet stitches are stabilized and the loops left free.


Heirloom sewing is a collection of techniques used to add lace and embroidery to special-occasion garments, often with Edwardian- or Armistice-Era design elements. Among these techniques are lace insertion, in which a strip of lace with unembellished edges is inserted into the body of a garment piece (see images here), and the underlying fabric cut away to create an element of airiness, and puffing strips, in which a long strip of fabric is gathered on both long sides, attached to lace insertion on both sides, and then inserted into a garment to create a dimensional effect (images). Several lace insertions, with or without puffing strips, may be sewn one to the other to create a broader trim known as a fancy band.

Hairpin lace, heirloom lace insertions, puffing strips, and fancy bands are similar in that they are narrow strips of material that can be combined to create a wider material which can be used either to create a garment or as decorative elements within a garment.
Hairpin techniques used to
edge and join Sashay

Lengths of mesh yarn can be used in place of strips of hairpin lace, or in the design space of lace insertions or puffing strips, to create similar effects in knitted and crocheted garments. One pattern that uses mesh yarn in place of hairpin lace is Red Heart Yarn's Wrap and Go Shawl.
Splicing together two strips of Starbella

To splice together two strips of mesh lace

  • Match your thread size to the threads used to make the mesh yarn (Starbella takes size 20 or 30 crochet cotton)
  • Count the number of stitches between a thread's connections to its adjacent thread (A), and the number of stitches in which it is connected to that adjacent thread (B). For the sample of Starbella above, A = stitches and B = 2 stitches along Thread 1.
  • Choose a steel hook size to create same number of chains/stitches per inch with crochet cotton. (In the example to the right, I used a number 12 hook and size 30 crochet cotton. I should have probably used a number 9 hook.)
  • Chain 1/2 A, then connect to Strip 1 with B stitches. Chain 1/2 A, then connect to Strip 2 with B stitches. Repeat until you run out of length on the two strips.
Detail

Interweaving two strips of Sashay

To interweave two strips of yarn together

Detail
  • Pull Thread 1 of the first strip through Thread 1 of the second strip. 
  • Insert the hook (or needle) through the next open space on Thread 1 of the second strip; pull through the loop on the hook (or needle).
  • Insert the hook (or needle) through the next open space on Thread 1 of the first strip, pull through the loop on the hook (or needle)
  • Repeat as long as necessary to create the required length of ruffle yarn.


Friday, March 8, 2013

Changing the Ruffle Width

The mesh structure of ruffle yarns allows us to play with the width of the ruffle — that is to say, how far it stands out from the body of the fabric. In sewing, a narrower ruffling strip makes a narrower ruffle, and that's pretty much the end of it. (Unless you're ruching the strip, which is the subject of another post.)

We can create a narrower ruffle in two ways:
  1. We can work the first two, three, four, or more threads together into a thick working edge.
    Working the first, first two, first three, and first five threads of Sashay.
    Chain side of 5, 3, 2, and 1 worked threads

  2. We can make the second, third, fourth, or middle thread as if it were the working edge, leaving Thread 1 to form a second, often shallower, double ruffle.
Top to bottom: Chained 5th thread; chained first 5 threads together; chained first 3 threads together; chained 3rd thread

Ruching

Ruching is a pleating or ruffling technique of taking equal, measured stitches diagonally across a narrow piece of trim in a zig-zag pattern and gathering the fabric along the seam line, straightening out the seam. The result is equally-sized puffs of fabric on both sides of a central seam, each side offset from the other by half the length of the zig-zag.

The orange yarn marks the ruching path

The blueish yarn marks the ruching path
The gathering (ruching) thread has been drawn straight.
Starbella Flash drawn up on ruching thread

Another method is to slip stitch along the ruching lines. This creates an equally measured path along which the yarn can be easily folded, creating two overlapping rows of petals.

Top: Starbella Flash trimmed in Lily Daisy #30 crochet cotton
Bottojm: Trendsetter Flamenco trimmed in Velnette


When wrapped spirally, ruched ruffle yarn makes a distinctive ruched rose.

Monday, March 4, 2013

Adding Your Own Edge Treatment

In addition to the embellishments that already exist on many ruffle yarns, you can add your own twist by crocheting, tatting, or using another edging technique to add color, depth, fill, or other design to your mesh yarns.
Adding crocheted edgings to Trendsetter Yarns' Flamenco.
For some, this may seem to be gilding the lily, but having two finished edges emphasizes a number of design options  —  such as double ruffles and mock hairpin lace.

Keep in mind include the size, weight, style, and fiber of your added edge. While the simple shell edges I've added above are in scale for Trendsetter Yarns' Flamenco, the wool blend fingering yarn (Fox Brand Velnette, a vintage crepe yarn from from my stash) is so heavy, comparatively, that it wants to collapse the mesh, and as a dry-clean only yarn, would shrink and full at a different rate than the mesh yarn were someone to stick it in the delicate cycle, ruining a finished garment.

Starbella Flashedged in size 30 crochet cotton
More to scale is the simple single-crochet row of size 30 crochet cotton I added to the sample of Starbella Flash in the second photo. While I've not put enough trim on that yarn to be decorative, I wanted to emphasize the unembellished border for another technique I'll be demonstrating shortly.

Saturday, March 2, 2013

Design Elements: Stitch Length

Changing the length of one's stitch changes the depth of the ruffle and the thickness of the fabric. This is most apparent in crocheted work, as seen in the following examples of Flaunt:

Stitch length in Flaunt (Loops & Threads)
left to right: single, double, treble crochet
 As the stitch length increases, the visual effect of "ruffle" increases, as does the length of intervening unruffled stitch, so that in the treble crochet sample, we see distinct rows of ruffles, separated by spaces of solid work. Viewed from the edge, the front-back thickness of the work diminishes as there is less overlap between the "front side" and "back side" ruffles.

In wide-mesh yarns, this is evidenced in the tiered structure of the double crochet and treble crochet samples.

Stitch length in Starbella (Premier Yarns)
left to right: single, double, treble crochet
As gravity causes the stitches to pull in a vertical direction, these tiers can separate to the point of feeling stringy.
Starbella scarf, close up


Varying the stitch length can also be used to confound the row structure on dense work, as seen in this hat:
Sashay hat
Ruffles, close up
Interior of hat

Tuesday, February 26, 2013

Technique: Mitered Cast On and Bind Off

One method of hiding the raw edges on ruffle yarn is to work them into the bind on and cast off of a piece.

Casting On


Fold the raw edge diagonally so that the first row of alternate spaces meets the loops formed by Threads 1 and 2.
Match the loops to the alternate spaces. You may need to pin the openings to a padded board to keep them aligned.
Cast on or chain as usual, keeping the matched openings together.


Finishing Off

As you approach the end of your piece, count out the number of loops you need to bind off and/or finish the final row or round. You should do this when you require one or two loops more than the number of alternate rows on your yarn.
Cut the yarn with two or three loops more than you need to finish your work.

Fold the raw edge diagonally so that the first row of alternate spaces meets the loops formed by Threads 1 and 2. Be sure to make your fold so that the raw edge will end up on the inside of the work, rather than the outside (as I did in following photos).
You may need to transfer the matched loops to a cable needle or other holding needle to keep them in order as you finish the final row.
A third needle keeps the loops-to-be-worked straight

Continue to crochet, or to bind off, as usual. Finish and secure the threads and open loops at the working edge.
A mitered bind-off


Note that if I had folded the raw edge to the other side of the working edge, the raw edges at the top would have been hidden.

Counting Stitches: Alternate Spaces

Some patterns and techniques will require you to make use only of spaces in a pattern that is perpendicular to a particular loop -- say, to create a mitered corner or a traditional (bent at 45-degree angles) ribbon rose.
Depending upon whether your spaces are to start, you would use either the spaces defined by the capital letters below, or the spaces defined by the lower-case letters.


Or, in the theme we discussed earlier, usually the odd-numbered spaces, but occasionally the even-numbered ones.

Monday, February 25, 2013

The End of the Yarn

There are two places in our work in which we come to the end of the yarn: when we are about to finish a skein in the middle of our work (and need to graft in more yarn to continue), or when we come to the end of our work and need to secure the final stitches.

Because of its bulk, the ends of a ball of ruffle yarn cannot be woven into the work the same way we work in the ends of traditional yarns.


Adding More Yarn

We've come to the end of our yarn


Overlay the old and new yarns
(contrast used to demonstrate technique)
Work the two yarns as one until the old yarn runs out

When adding more yarn, overlap the last three or four loops of the ball you are about to finish with the first three loops of the  new ball. Work the loops of both balls together, the same way you did with the folded-over loops at the start of  your work.


Now working with just the new yarn

How the old and new yarns work into each other
(this would be invisible with the same color yarn)


Finishing Your Work


With a Pulled-Through End (Ribbon Yarns, Worked As Yarn)

As you approach your last several stitches, count out the number of loops you will need to complete those stitches, plus an additional four loops. 

When you get to the end of your work, pull the remaining yarn through the last loop.

Pull to tighten the last stitch and secure the tail.

If the stitch will not tighten (which is typical for ruffle yarns), you will need to use sewing thread to secure the tail to the back of the work.


With a Sewn-In End

As you approach your last several stitches, count out the number of loops you will need to complete those stitches, plus an additional four loops. 

Cut the yarn along its width. 

Fold back the last four loops of the yarn, the same way you did with the first two loops when starting your work.

Work as usual, binding off (knitting) or crocheting your final stitches.

At the end, you should have a single loop of doubled yarn on your hook or needle. 

Take a needle and sewing thread, and sew this loop, either to the first two unworked threads of the yarn's edge, or to the previous two or three stitches of your work.

With a Knotted End (Mesh Yarns Only)

As you approach your last several stitches, count out the number of loops you will need to complete those stitches, plus an additional few loops. 


Cut the yarn along its width. 

Using only the four extra loops, cut the yarn along its length between the second and third threads, or between the highest-number worked thread and the thread beneath it..(If the yarn has many threads, you may want to make a parallel cut several threads down, to end up with two "strings" of about equal bulk, plus an embellished tail.)


At the end of the work, pull the working threads through the loop formed by the last stitch, leaving the cut part of the yarn behind.

Using the pulled-through yarn as one "string", and the remainder as a second "string", tie the two strings together using a square knot.


Trim the trailing ends, (and if appropriate, the embellished tail).