Thursday, February 21, 2013

Starting Work: Crochet


The Foundation Chain

After preparing the yarn, unroll a foot or two so that the working edge is at the top, and the free edge is at the bottom.

Large Net and Ribbon Yarn

Fold over the raw edge between the second and third loops so that the second and first loops exactly overlay the third and fourth loops.
Starbella FlashRibbon Yarn (Loops & Threads Flaunt)

Considering only the working edge, the first double-loop from the folded edge is your initial slip knot. Insert the hook into the second double-loop and pull through the first for your first chain. Place a stitch marker through the first chain stitch.

Stitch marker through first chain stitch (lower right)
Continue to chain by inserting the hook through the next open loop of yarn and pulling the thread through the chain loop on the hook.


Small Net Mesh Yarn

Fold over the raw edge 1"-2" (2-5 cm) on a narrow yarn, or 3" (8 cm) on a wider yarn, matching loops on the working edge.


Insert the hook into the working edge about 1/2" (1 cm) from the folded edge.

Considering only the working edge, insert the hook about 1" (2.5 cm) from the loop already on the hook; pull through the loop on your hook for your first chain. Place a stitch marker through the first chain stitch.
Second chain. Notice stitch marker under thumb

Chaining


If you start your work with a chain, continue chaining in this manner until you have as many stitches as your pattern requires. Place a stitch marker through the last chain before starting your first row.


The First Row


The top chain of Flaunt is highlighted in yellow The top chain of Twist & Twirl is highlighted in green
Looking  at the top of the chain you just completed, you should see what looks like a traditional chain stitch, formed by the working edge. This is the part of the work into which you will insert your hook for the first row of stitches.


Continue to use the next open loop on ribbon and large mesh yarns (or the loop about 1" from the previous yarn-over on small mesh yarns) for yarn-overs, while in all other ways forming your stitches as usual.


Notes

Remember to move up your stitch markers at the beginning and end of each row, or at the beginning of each round.

If for any reason you need to stop your work, remove your hook from the active loop and insert a locking stitch marker in its place.


Saturday, February 16, 2013

Starting Work: Knitting

Casting On

After preparing the yarn, unroll a foot or two so that the working edge is at the top, and the free edge is at the bottom.
Raw edge, Starbella Flash (Premier Yarns)
Fold over the raw edge between the second and third loops so that the second and first loops exactly overlay the third and fourth loops.
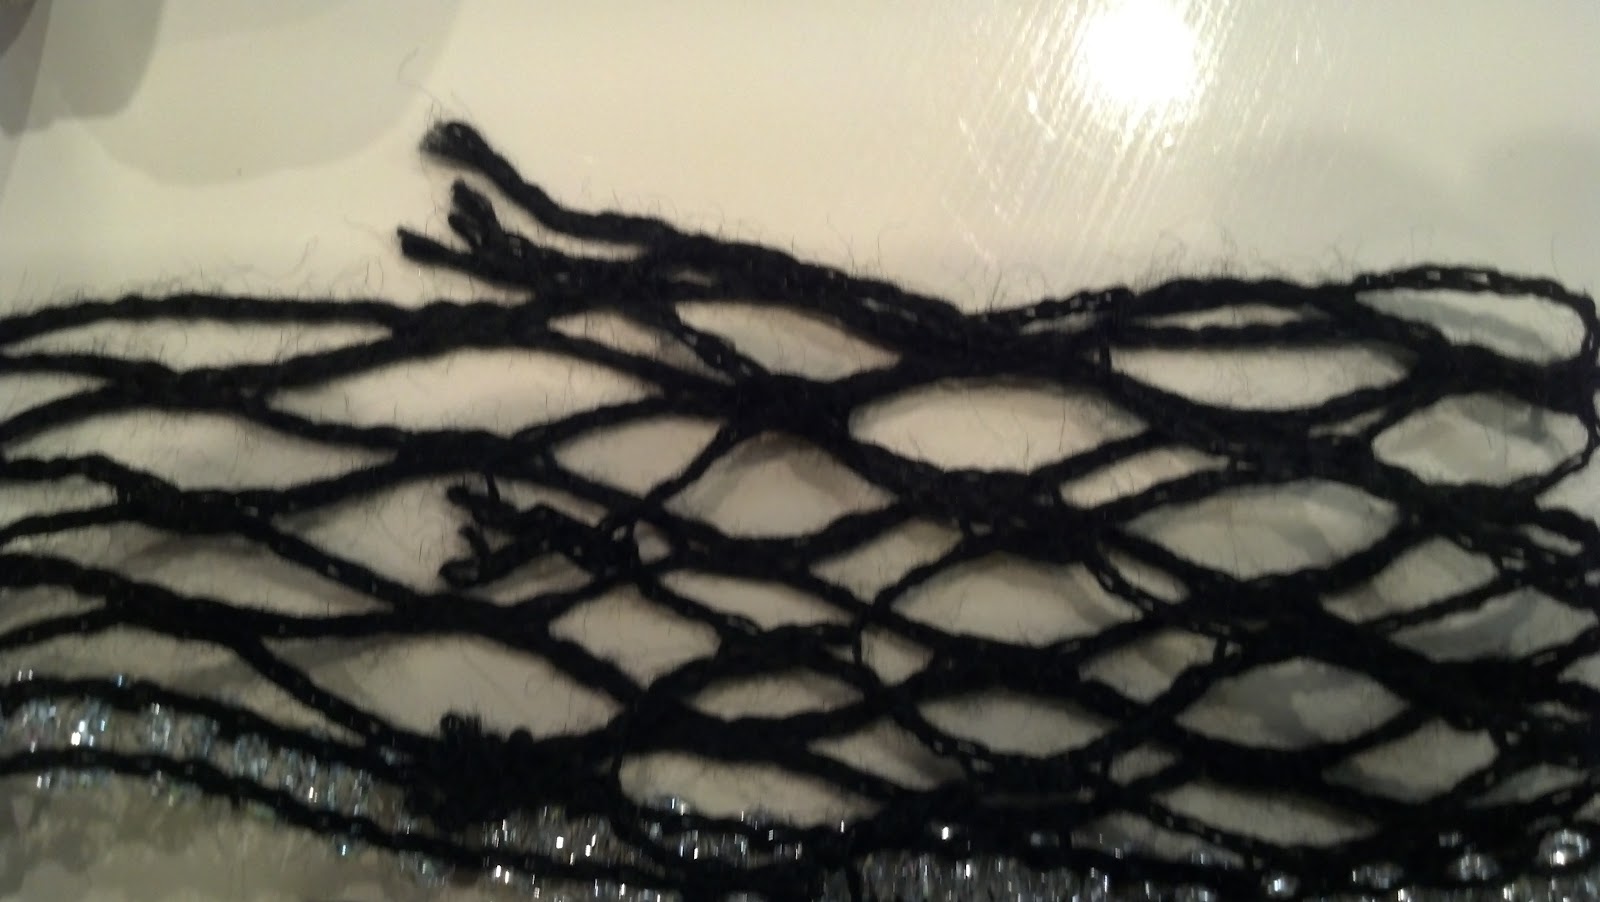
Raw edge has been folded over, matching loops
Sashay (Red Heart Boutique)


Slip the first double loop of the working edge over the left knitting needle (if you knit right-handed) from back to front if you work English or Continental, or from back to front if you work Eastern.
Casting on the first stitch


Slip the second double-loop over the needle (this should bring the raw edge closer to the middle of the work.
The second stitch
Slip the first single loop (the third loop from the folded edge) over the needle. Continue until you have slipped as many loops over the needle as the number of stitches you need to cast on.


A short row of cast-on stitches


The First Row

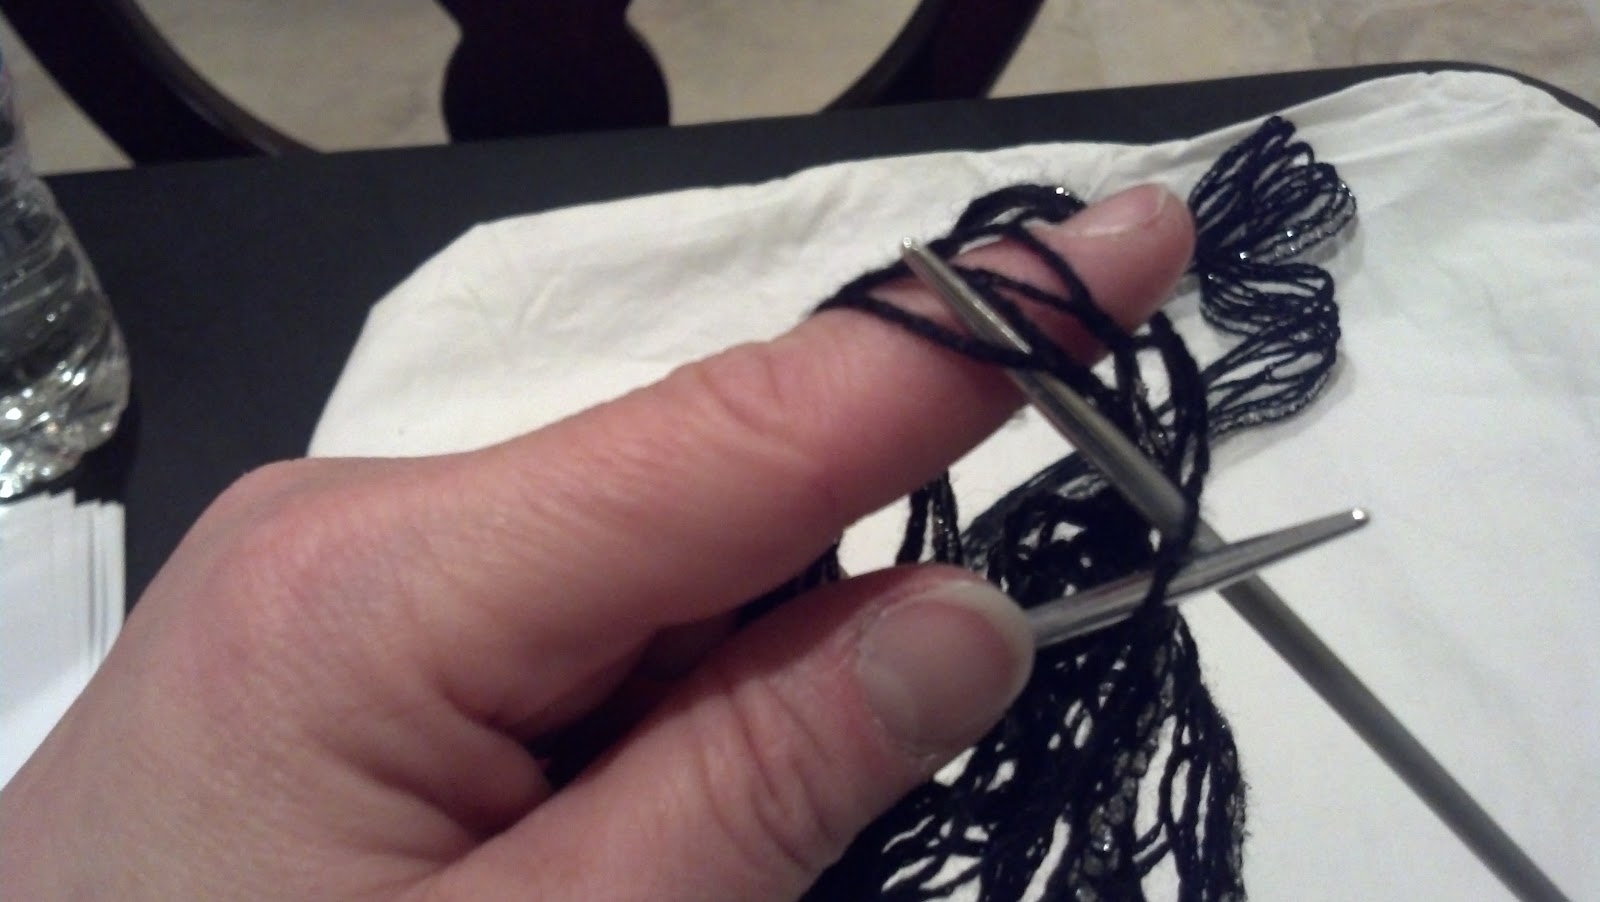
Note how Flaunt is kept tensioned and untwisted to start the row.
Hold the yarn spread-out and flat, draped from front to back over your index finger, using your thumb and second or third fingers to tension the yarn and stretch the spaces made by threads 1 and 2 (or on a ribbon yarn such as Red Heart Boutique Ribbons, between the working-edge thread and the ribbon).
Sashay tensioned for knitting


Insert the right needle through the first stitch as usual. Use the right needle to pick up thread 1 (the working edge) of the ball yarn from the nearest unworked loop. Complete the stitch as usual.
Starbella Flash tensioned for knitting

Repeat to the end of the row, treating the loops of the folded-over edge together with the loops of yarn with which they were matched for the initial cast-on.
Finishing the first row: work in the folded-over edge

Turn the work so that the stitches are on the left needle (if you knit right-handed, or the right needle if you knit left-handed), being careful not to twist the yarn.

The Second Row

Knit (or purl) as usual.

Flaunt after three rows.
Note how the ribbon nests over each previous row.


Sashay has been kept untwisted through multiple rows

A tip about knitting needles: If you expect to have to put your work down for any reason, you will need to make sure that your stitches don't fall off either the back or the tip of the needle, as well as making sure that threads other than the working thread don't loop over either end of the needle and confuse your stitch count. One way to do this is to make a set of four hardboard or foam core disks, about 1.25" (3 cm) in diameter, with center holes just large enough to fit your needles through. Thread one disk to the back of each needle before casting on; put one at the end of work on each needle before putting it down. Another method is to knit on round needles, and bind the two needle ends together.
A hardboard disk keeps stitches from slipping off the back end


Wednesday, February 13, 2013

Techniques: Work As Yarn


There are many ways in which ruffle yarn can be worked, and it's my intent to explore as many of them as I can find, or can think of. As with any other endeavor, it's best to start with the beginning.

 Work as Yarn

Starbella Flash knitted as yarn (size 17 needles)
The easiest way to work with ruffle yarn is to work it unspread, as if it were a bulky or super-bulky yarn (numbers 5 and 6 on the Craft Yarn Council's Standard Yarn Weight System. If you plan to do this, you will need large knitting needles (size 13/9.0mm or larger) or a large crochet hook (N/9.0mm or larger)
Starbella Flash crocheted as yarn (size K hook)


Note that the larger the needle or hook, the easier it will be to avoid splitting the yarn when working. Do not prepare the yarn as for ruffle work. If you prefer, and your yarn is shipped in pull-skeins, you can work from the center.
Pull Skein (Red Heart Boutique Sashay)

Cast on, chain, or crochet your foundation row as usual. Work done this way will not have a ruffle texture.


Saturday, February 9, 2013

Defining the Width: Rows and Spaces


Because some patterns and techniques may specify either collapsing several threads together to create a thicker working edge or working with interior spaces (spaces that are formed by openings between threads other than Thread 1 and Thread 2), we need a common way to refer to these threads and spaces..
Sashay has 10 threads plus an embellished edge

In Knockout Kreations' Simple Switchin' Headbands, Angelina refers to the spaces between two long threads as "rows of loops". While she begins numbering them from the embellished edge, it is more practical to number them from the working edge, since different yarns have different numbers of threads, and different arrangements of threads, across their widths.

I tend to look at the width-wise spaces of a  yarn through a line perpendicular to the yarn's length. For example, I see either three full spaces across the width of Starbella (marked A, B, and C), or four spaces (a, b, c, and d). Kind of confusing, right?
Starbella Flash has seven threads (plus an embellished edge) - but how many spaces?
In the end, I think Angelina has the right of the count, while not of the order:  if we number our width-wise spaces based on the thread count, the confusion disappears, even if those spaces seem to progress in a zig-zag faxhion:
Starbella Flash - The threads are numbered yellow; the spaces, white.

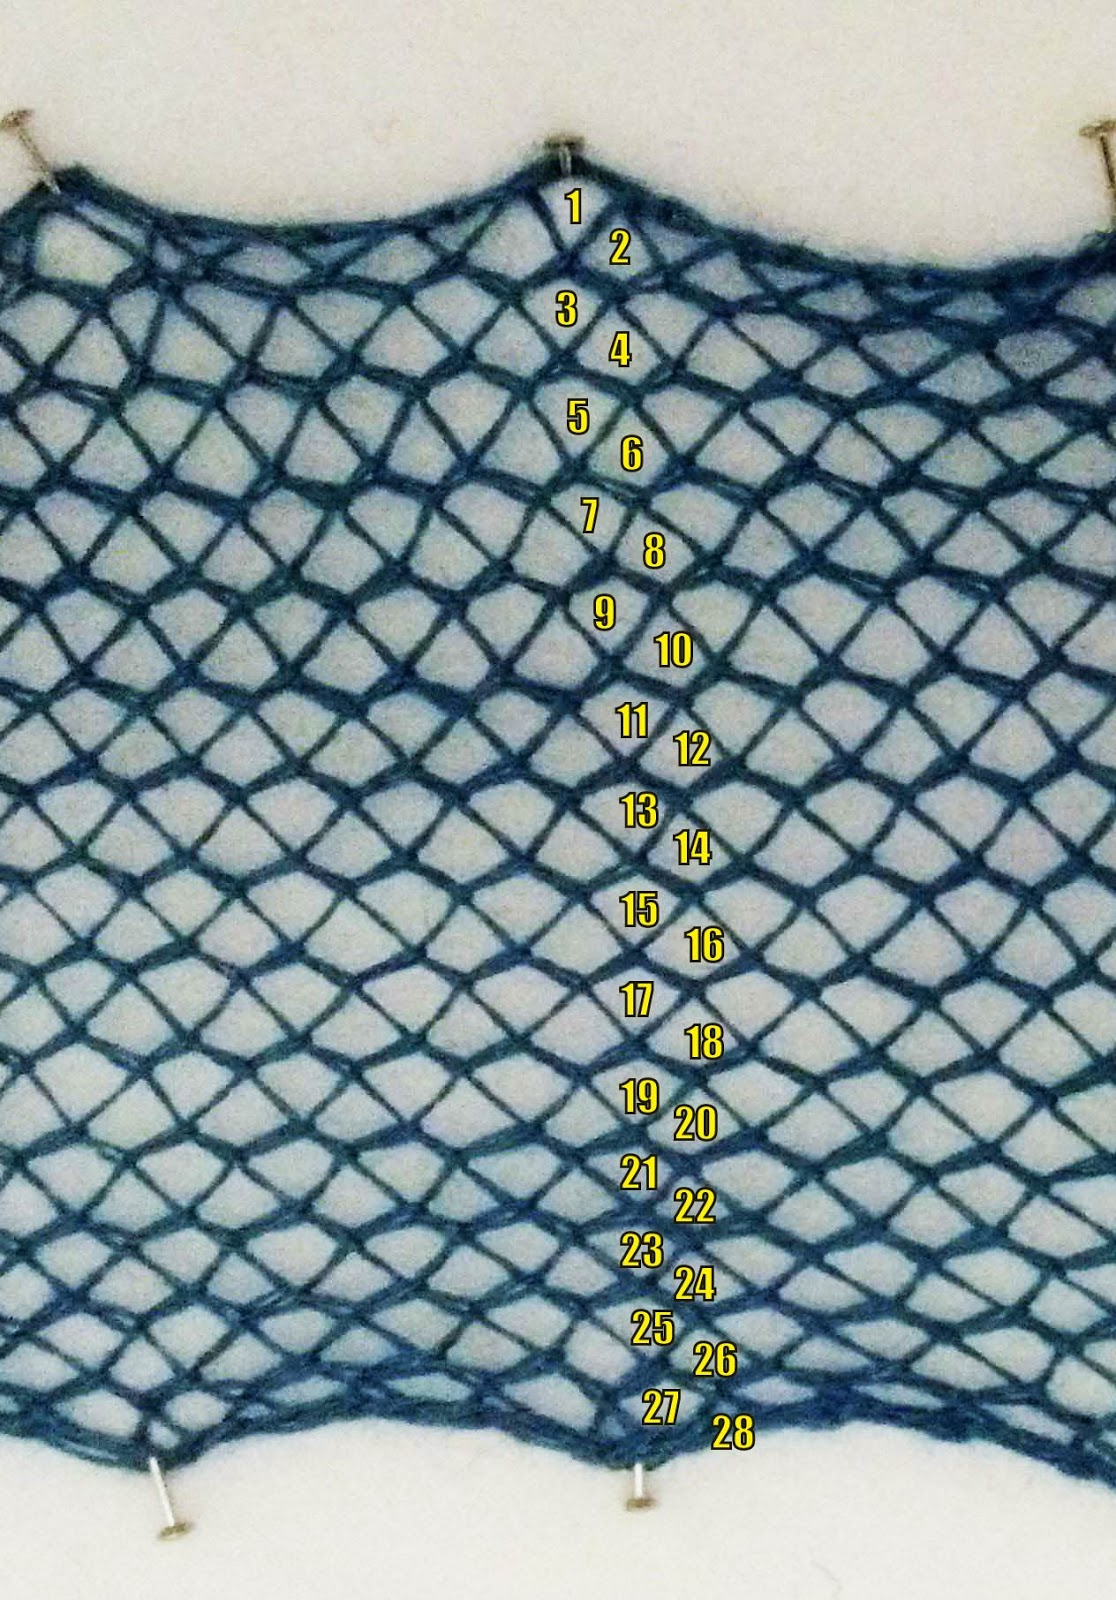
Space 1 is formed by threads 1 and 2; space 2 is formed by threads 2 and 3; space 3 is formed by threads 3 and 4, and so on. By this method, Sashay has 10 spaces, Pirouette has 6, and the smaller-holed Twist & Twirl, 28.
Spaces in Sashay

Piroutte has six spaces
plus a three-row embellished edge

Twist & Twirl has 28 spaces


It may be easier to envision the spaces as forming a sort of diagonal across the width of the yarn, as you can see in this sample of Trendsetter Yarns' Flamenco.
Spaces in Flamenco (Trendsetter)

Thursday, February 7, 2013

Loops, Threads, Holes, and Spaces

The next thing we need to learn about ruffle yarns is how to refer to their internal structure.

When we look at ruffle yarns, we often look at them like we looked at sewing cards as children -- that is, we see specific holes into which we are supposed to insert our knitting needles and crochet hooks to make a scarf, shawl, or fancy trim.

Depending on who you talk to and the type of ruffle yarn you are talking about, these holes may be called "loops", "spaces", or "holes". Specifically, since fabric-based ruffle yarns have regular round holes punched in the manufacture of the yarn, the place-to-put-your-needle is very definitely a hole.
Tecido Trico (Sky Blue) by Knitting Fever
Most ruffle yarns are constructed several mutiple-ply threads that are connected to each other at evenly spaced intervals, alternating between the left-neighbor and right-neighbor threads.
Starbella by Premier Yarns
For ease of navigation, I propose numbering these threads, starting from the working edge, like thus:
Sashay by Red Heart
Starbella Flash by Premier Yarns
Most patterns for working ruffle yarns ask the needleworker to work with the portions of the working edge between its connections to Thread 2, asking her to place her needle through the "loop" or "space" created between two adjacent connections.  

My next post will deal with describing the yarn across its width.

Wednesday, February 6, 2013

The Working Edge

Many ruffle yarns have two distinct edges: one which looks like most of the rest of the net, and one which is thicker, wider, more-closely woven, or embellished with metallic thread, chenille, "eyelash" or "fur" treatments, or pom-poms.

The typical method of working this yarn is to work along one edge off the yarn, leaving the rest free to form ruffles and swirls.

For the purposes of this workbook, the edge which looks like most of the net will be called the working edge, and the edge with the trim will be called the embellished edge.

Red Heart Boutique Sashay

Premier Yarns Starbella


Patons Pirouette
On ruffle yarns without a distinct embellished edge, either edge can be considered the working edge, as long as that choice is kept consistent through the work*. The edge that is not worked is called the free edge. (For yarns with embellished edges, the terms "embellished edge" and "free edge" may be used interchangeably.)

Bernat Twist & Twirl

On ribbon yarns, the choice is quite simple: the edge with the loops is always the working edge; the edge with the bound fringe is always the embellished, or free, edge.
Loops & Threads Fabuloso

Monday, February 4, 2013

How to Prepare Embellished Mesh Yarn

Preparing ruffle yarn with an embellished edge uses techniques from both ribbon yarn and unembellished mesh yarn.

Start by spreading out the end the same way you would for unembellished mesh yarn.

Embellished edge yarns may not need encouragement
to open up their mesh as you press them.
(Starbella Flash by Premier Yarns)
Often, once you've spread out the end and started ironing, the rest of the yarn will spread out into place, and you can iron it just like ribbon yarn.


Pinning the yarn straight
(Red Heart Boutique Sashay)
Sometimes, the yarn doesn't want to stay open, or it folds back over on itself, or it comes off the ball crinkled or twisted, and you need to straighten it out with your fingers, spread it, or tension it the same way you might need to do with unembellished mesh yarns.

Lightly starching the mesh will provide a stiffer working mesh, and may help you better see the internal structure (check for colorfastness first!).
Starbella Flash, starched and spooled
Patons Pirouette